Wednesday, September 12, 2012

Baltimore Weekend with the Parents

A few weeks ago my parents came to visit Matt and I and we had a full weekend of fun in Baltimore. 

First we visited the Edgar Allan Poe House and the cemetery where he was buried. Kelly and I went to the house last year when she came up but unfortunately it was closed :( so it was neat to get to go inside this time. To my surprise, the house was
tiny! I didn't realize in that time it was normal to live in such a small space! The staircases were so small, I felt absolutely claustrophobic and there was no way more than one person could pass each other on the stairs so we could only go one at a time. 


Matt going up to see Poe's bedroom

This is Poe's bedroom on the third floor and what I assume was his original furniture

This is the church where Poe is buried. It is located at Westminster Hall in Baltimore.

Where Poe was originally buried in 1849, until the new monument was built.
This is where Poe's body was moved in 1875.

After all of our Poe sightseeing, we went to the Inner Harbor to look through the shops and walk around before the baseball game started.


This is the Urban Pirates ship in the Inner Harbor. (Matt and I went on a pirate cruise on this ship last spring!)

View of the Inner Harbor

Although we are Panthers fans, I still like the Ravens! Who wouldn't like living 10 minutes from a NFL stadium?!
Matt and I LOVE going to Orioles games. I think we've been to at least 15 this summer. It is so much fun! So, I had to take my parents to see a game while they were here. I have yet to attend a game that the Orioles have lost so I had my fingers crossed that I wouldn't break my streak and of course they won! :) 

Camden Yards

They played the Toronto Bluejays and won 8-2!
 On Sunday we visited Fort McHenry, where the Star-Spangled Banner was written. Mom says "If you've been to one fort, you've been to them all" but this one was truly neat! I didn't even realize that this was so close to where we live. They had a whole presentation showing the events leading up to Francis Scott Key writing the song and it really gave you an new appreciation for our National Anthem. 


Where the original flag was flown


I had to get a picture of Matt in the jail cell. I even closed the latch, too bad I didn't have a lock to lock him up! ;)

...and one of me too :P

We also visited the Fell's Point area (which is our favorite neighborhood of Baltimore) but we didn't get any photos. It poured down rain that day and we all looked like drowned rats! We had a lot of fun and really enjoyed having my parents here for the weekend!

Friday, September 7, 2012

Autumn

With fall right around the corner, I decided to work on a fun craft featuring fall colors and leaves! 


I created the jars myself using ideas from a Martha Stewart holiday craft book I have. (Thanks Mom!)

First, I'll describe how I created the jar with the leaves using wax paper and crayons! I had a box full of nothing but the "ugly crayons" thanks to the popular crayon melting art I'm sure you've seen on pinterest..


I laid down a long sheet of wax paper on my ironing board, and turned the iron on the lowest setting. I also placed some printer paper underneath the wax paper to make sure the crayon didn't leak through. I then shaved some of the crayons onto the paper using a pencil sharpener. 


Shave the crayons on half of the wax paper and leave the other half free. I repeated this with about 6 different crayons in fall colors, then folded the wax paper on top of itself. As shown below:


I laid the iron on top of the paper and it instantly started to melt. I believe if you put less wax and spread them out more, they will not blend together as much, but I actually liked the effect from them bleeding together because it made my leaves turn out more realistic.


I then unfolded the paper, giving me two identical sheets of wax paper with the crayon wax on both sides. I drew out leaves on the non-wax side and cut them out. 


Because I didn't have any Mod Podge, I decided to make my own. I simply mixed together equal parts Tacky Glue with water and stirred it together. I added a little glue at a time until I created something like Mod Podge. I actually used the Tacky Glue on the back of each leaf and glued it to the jar just to make them stay on a little better. Then I went over all the leaves with a few layers of my glue mixture. 


After allowing the glue to dry, my jar turned out like this! :)


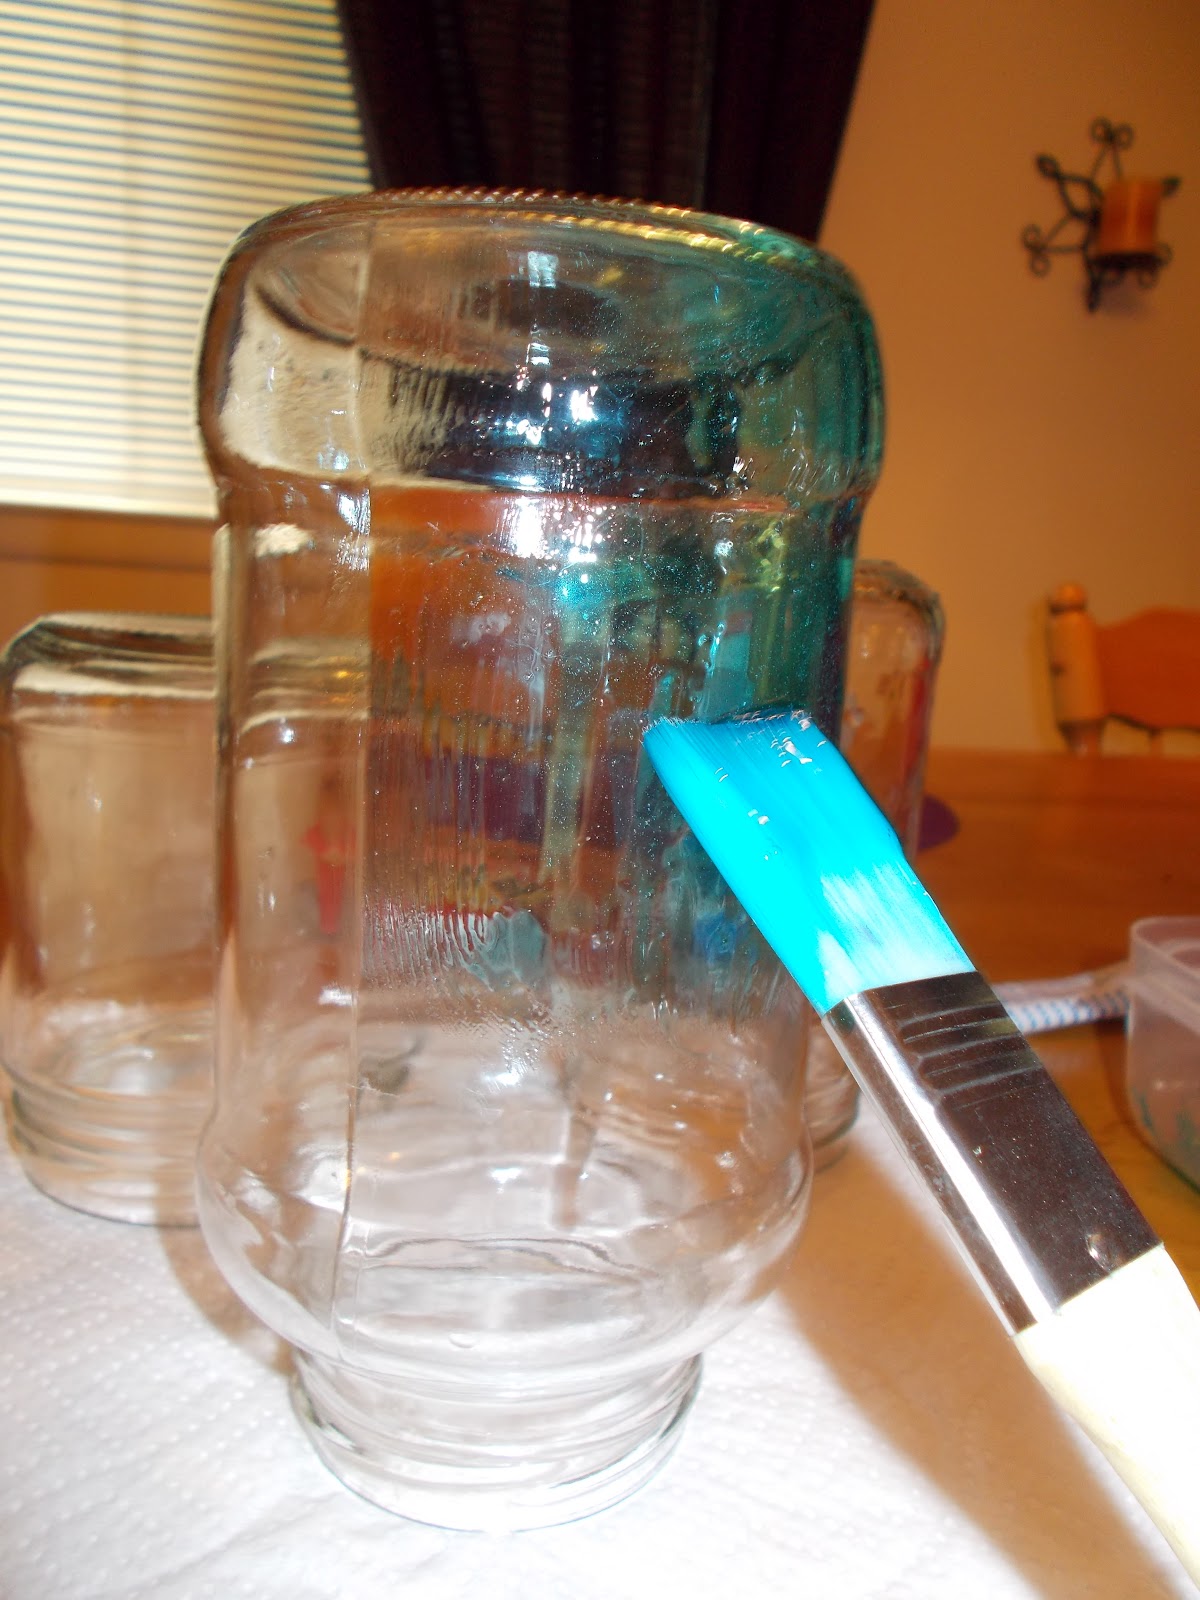
I also made the red and orange jars using the technique from a previous post. Click Here!

I love how this turned out, so here are a few more pictures, just for fun :) I got the pumpkins (they're fake), the black wire pumpkin, and leaf garland from Micheal's. The candle stick holder and candle are a gift from Matt's mom (thanks!). And of course the jars are mine. :)


Wednesday, September 5, 2012

Jar Dyeing


I've seen this tutorial several times on pinterest to make jars look like sea glass by mixing glue with food coloring and painting the glass. So, I thought I would give it a try. Above is how my jars turned out. Not exactly sea glass, but still pretty nonetheless.

First of all, I washed out the jars. I had a salsa jar, pickle jar and marinara jar that decided to use because they were different shapes and sizes.


I simply filled the sink with soap and hot water and the labels fell right off.


On two of the jars, the expiration date was printed directly on the jar, so I used nail polish remover and it came right off!


Next, I mixed together my glue and food coloring. I originally wanted to make the jars three different shades of blue and try to create an ombre effect, but that was easier said than done :( (let me know if you can get yours to look ombre!)


I used blue gel glue because that's all I had on hand. I think this was my downfall on the "sea glass" effect. Try the white glue for that effect!


I mixed together the glue and a little food coloring at a time to get the color I wanted. I also added a little water so it wasn't so thick.


I placed my jars on paper towels and started to paint! I found that the glue bubbles up a little if you put too much, so just do a thin layer at a time and try to even it out with your brush.


Being as impatient as I am, I dried my jars with a hair dryer. This worked like a charm and they were instantly dry!


This was a fun project, but talk about MESSY! My hands were completely blue after. Haha! I found that white vinegar takes the color off pretty well.


And here's the finished product! I added tea light candles inside and made them pretty blue candle holders. I'm happy with the way they turned out and plan on doing another jar project for fall! Stayed tuned for another tutorial. :)